

Building a Stronger Back: Week 5 Beginner's Exercise Plan
Welcome to Week 5 of your Back Exercises Plan for Beginners! If you've been following along, you're on a journey to build a strong and resilient back. This week, we continue to focus on simple yet effective exercises designed for beginners.As you progress, you'll notice improvements in posture, strength, and overall back health. Remember, consistency is key, so stick with it! This week's routine includes gentle warm-ups to prepare your muscles, followed by beginner-friendly back exercises such as rows and lat pulldowns. These movements target different muscle groups in your back, promoting balanced development.
Safety is our priority, so always maintain proper form and listen to your body. If you're new to exercising, consult with a fitness professional or healthcare provider. Let's keep moving forward on your journey to a stronger, healthier back!
Week 5 Overview:
Progression Peaks:
- Week 5 marks a pivotal point in our back exercise program, where participants witness significant progress in strength and endurance.
Increased Intensity:
- The routines this week are designed to intensify the challenge, pushing participants to new limits. Incorporating advanced variations of familiar exercises ensures continuous growth.
Targeted Muscle Engagement:
- Specific focus on muscle engagement is a highlight this week, refining form and maximizing the effectiveness of each movement.
Strategic Variations:
- Introduction of strategic exercise variations helps prevent plateaus, keeping the body responsive to the training stimulus.
Feedback and Adjustments:
- As participants reach Week 5, individual feedback is incorporated, tailoring the program to personal needs and ensuring a customized fitness journey.
List Of Back Exercises Week 5
1. Deadlift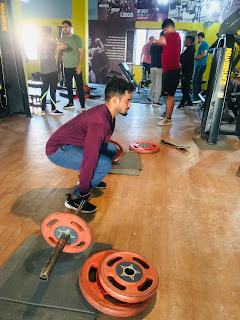
The deadlift, a fundamental pillar of strength training, stands as a quintessential back exercise. Targeting various muscle groups, including the erector spinae, lats, and traps, it epitomizes functional strength. Executed by lifting a loaded barbell from the ground to a standing position, the deadlift promotes not only a robust posterior chain but also enhances overall athleticism. 
Its versatility extends benefits beyond muscle development, fostering core stability and grip strength. As a compound movement, it engages multiple joints, making it a cornerstone in any comprehensive fitness routine. Mastering the deadlift not only forges a formidable back but also cultivates a resilient physique.
2.Grip the Bar:
Step-by-Step Guide to Deadlifting
1.Put the Barbell Together:
- Place the appropriate weight plates and the barbell on the ground.
- Keeping your toes pointed forward and your feet hip-width apart, place the barbell over the center of your feet.
2.Grip the Bar:

- Bending at the hips and knees but keeping your back straight will help you lower your body.
- The bar should be held with both hands, separated by no more than the width of a shoulder. Both overhand and mixed grips are acceptable (one palm facing you, one facing away).
3.Set Your Back:
- Maintain a neutral spine, shoulders back, and chest up.
- To protect your lower back and support your spine, contract your core.
4.Lift with Your Legs:
- Drive through your heels and simultaneously straighten your hips and knees to start the lift.
- Aim to move the bar in a fluid, controlled way while keeping it close to your body.
5.Take a Stand:
- As soon as the bar reaches your knees, raise your shoulders and stand tall.
- To fully engage your hip extension at the top of the movement, squeeze your glutes.
6.Lower with Control:
- Bend your knees and push your hips back to reverse the motion.
- Controllably lower the barbell to the floor while keeping good form.
Common Form Mistakes to Avoid:
Rounding the Back:
- To avoid damage, maintain a neutral spine. The lumbar spine may experience undue tension if the back is rounded.
Lifting with the Back:
- The main motion in a deadlift is a hip hinge. Use your legs and hips to help lift the weight instead of your back.
Overextending at the Top:
- Although maintaining a tall posture is important, try not to overextend your lower back. Keep your spine in its normal position.
Deadlift Variations for Beginners:
1.Romanian Deadlift (RDL):
- Focuses on the hip hinge movement with less knee bend.
- Keep the bar close to your body, and lower it just below your knees.
2.Trap Bar Deadlift:
- Utilizes a specialty hexagonal bar.
- Easier on the lower back and may be more comfortable for beginners.
3.Sumo Deadlift:
- Wider stance with toes pointed outward.
- Reduces stress on the lower back and emphasizes the inner thighs.
2. Bent Over Row
The Bent Over Row is a great back exercise that helps strengthen your upper body muscles. To do it, bend your knees slightly and lean forward at your waist. Hold a weight in each hand, and then pull them towards your chest, squeezing your shoulder blades together. This movement targets your back muscles, especially the lats. 
It's like giving your back a friendly hug with weights! Make sure to keep your back straight and engage your core for maximum benefit. Bent Over Rows are awesome for building a strong and toned back, making you feel powerful and ready to conquer anything!
Benefits of Bent Over Rows:
Using various Muscle Groups:
- The bent over row promotes healthy growth in the middle and upper back by using various muscle groups.
Strength and Power:
- This compound exercise is beneficial for both fitness lovers and athletes because it enhances general strength and power.
Posture Improvement:
- Preventing back discomfort and enhancing general spinal health can be achieved by strengthening the muscles involved in maintaining proper posture.
Step-by-Step Instructions:
1.Set up
- Place your toes forward and your feet shoulder-width apart when you stand.
- Using an overhand grip and hands somewhat wider than shoulder-width apart, hold the barbell.
- Maintaining a straight back, bend at the hips until your body is almost parallel to the floor.
- Maintain a modest bend in your knees and a strong core.
2.Execution
- While maintaining your elbows close to your body, pull the barbell toward your lower chest.
- At the peak of the exercise, firmly compress your shoulder blades together.
- Return the barbell to its lower position carefully.
3.Breathing:
- Breathe in while lowering the barbell.
- As you raise the barbell, exhale while keeping your breathing steady and under control.
4.Sets and Repeats:
- To perfect form, start with a lower weight and aim for three sets of ten to twelve repetitions.
- As the exercise grows more natural to you, gradually increase the weight.
Proper Form:
1.Keep Your Back Flat:
- To prevent back pain, try not to round your back. Throughout the exercise, maintain an upright posture with your back.
2.Elbow Position:
- To properly target the back muscles and ease shoulder pain, keep your elbows close to your body.
3.Complete Range of Motion:
- Lift the barbell up until it makes contact with your lower chest, then release it when your arms are at their longest length. This guarantees that you are using your entire range of motion.
3.Lat Pull Down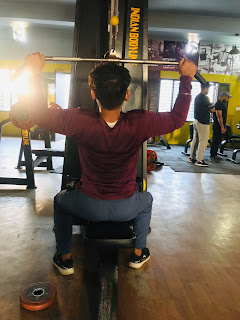
The Lat Pull Down is a great back exercise that helps strengthen and tone your upper back muscles. It's like magic for sculpting a V-shaped torso! You sit at a machine, grab a bar overhead, and pull it down towards your chest, engaging those awesome lat muscles on either side of your back. 
This exercise not only builds a strong and attractive back but also improves posture. It's like giving your upper body a superhero makeover. So, if you're dreaming of a strong, confident posture and a back that turns heads, the Lat Pull Down is your go-to move!
3.Position Your Body:
4.Seated Underhand-Grip Cable Row
The Seated Underhand-Grip Cable Row is a fantastic back exercise that targets those muscles you can't see in the mirror. Imagine sitting comfortably, pulling a cable toward you with your palms facing up—it's like giving your back a friendly hug!
Step-by-Step Instructions:
1.Adjust the Machine:
- After settling into a comfortable seat on the Lat Pulldown machine, adjust the knee pads to stabilize your position.
- Verify that your legs are snugly tucked behind the thigh pad.
2.Grip the Bar:
- Choose a grip width according to your goals and comfort zone. While a wide hold gives priority to the outside lats, a narrow grasp targets the inner lats.
- Ensure that the space between your hands is slightly larger than the breadth of your shoulders.
3.Position Your Body:

- Sitting upright means keeping your back straight, shoulders back, and chest up.
- Hold the bar with your palms facing away from you in an overhand grasp.
4.Engage Your Core:
- Tend your core muscles throughout the workout to maintain a stable spine.
- Retain a neutral spine posture to prevent overstressing your lower back.
5.Initiate the Movement:
- Start with your arms completely extended and your elbows straight.
- Inhale, then begin the pull by pushing your elbows back and down.
6.Focus on the Lats:
- Squeeze your shoulder blades together at the bottom of the exercise to fully engage your lats.
- Without leaning too far back, attempt to elevate the bar to the top of your chest.
7.Controlled Release:
- Exhale, extend your arms fully, and keep the bar in control as it returns to the starting position.
Proper Form Tips:
1.Prevent Momentum
- Avert utilizing your body's momentum to bring the bar down.
- Pay attention to executing the maneuver using the targeted muscles.
2.Elbow Position:
- To properly work the lats, keep your elbows in line with your torso.
3.Inhale Properly:
- Breathe in as you raise your arms and out as you lower the bar.
4.Seated Underhand-Grip Cable Row
The Seated Underhand-Grip Cable Row is a fantastic back exercise that targets those muscles you can't see in the mirror. Imagine sitting comfortably, pulling a cable toward you with your palms facing up—it's like giving your back a friendly hug! 
This move works wonders for building a strong and defined back, which isn't just about looking good but also about supporting your spine and posture. So, get ready to take a seat, grab that cable, and give your back the love and strength it deserves!
Pulling Motion:
Step-by-Step Instructions:
1.Setup:
- First, make sure the cable machine is at the right height.
- Make sure your feet are flat on the ground as you take a seat on the offered bench or seat.
- With both hands and with the palms facing up, grasp the underhand-grip handles.
- Maintain a tiny natural arch in your lower back while sitting upright.
Grip and Positioning:
- Grip the handles slightly wider than the distance between your shoulders.
- Your torso should be somewhat forward-leaning, and your arms should be fully extended.
Pulling Motion:

- Pulling the grips in the direction of your lower chest will start the rowing motion.
- At the height of the movement, concentrate on pressing your shoulder blades together.
- Throughout the move, keep your elbows tight to your torso.
Managed Release:
- Retrace your arms slowly to the beginning while keeping your body in control.
- To maintain tension in your back muscles, try not to fully extend your elbows.
Inhaling:
- Breathe in as you raise your arms in preparation for the next rep.
- To ensure that your muscles are receiving enough oxygen throughout the pulling phase, exhale.
Proper Form:
Maintain Posture:
- To prevent placing too much strain on your lower back during the workout, maintain your shoulders down, chest up, and back straight.
Controlled Motions:
- Be sure that the rowing motion you use is deliberate and controlled. Avoid using momentum if you want to ensure that the targeted muscles are used as efficiently as possible.
Adjustable Resistance:
- Start with a moderate weight and gradually increase it as your strength grows. It's crucial to strike the right mix between challenge and control.
Variations for Beginners:
1.Lighter Resistance:
- To concentrate on perfecting the form, start with a lighter weight.
- As your strength increases, progressively increase the resistance.
2.Arm-Single Rows:
- To focus on each side separately, complete the exercise with one arm at a time.
- This aids in correcting imbalances in the muscles.
3.Under supervision:
To guarantee proper form and technique, get advice from a fitness expert.They are able to offer suggestions and modifications based on your particular requirements.
5.Back Extension
Your lower back muscles can be strengthened using back extensions. You will be lying face down and using your upper body to lift against gravity throughout this workout. It improves posture and maintains the health of your spine by focusing on the muscles in your hips, glutes, and lower back. Back extensions work your entire body because they also work your core. 
You are increasing your flexibility and endurance as you raise and extend your upper body. It's a low-impact workout appropriate for all levels of fitness. Incorporate back extensions into your exercise regimen to strengthen your back, lower your chance of injury, and get the rewards of a healthy spine.
The advantages of back extensions
Lower Back Strength:
- The erector spinae muscles, which run along your spine, are the main goal of back extensions. Enhancing the strength of these muscles lowers the chance of injury and improves lower back support.
Glute Activation:
- By activating the glutes, the extension exercise tones and shapes the muscles in your buttocks.
Better Posture:
- Having a strong lower back helps to improve posture by decreasing the chance of slouching or growing a rounded back.
Enhanced Core Stability:
- By using the core muscles, back extensions improve balance and stability.
Step-by-Step Instructions:.gif)
Roman chairs or back extension devices are required pieces of equipment..gif)
1.Set up
- The back extension device can be adjusted to your height.
- With your feet tucked under the foot pads, in a seated position facing down on the pad.
2.Body Posistion:
- Lay your lower tummy and hips on the pad, leaving your upper body free to sway.
- Put your hands behind your head or cross your arms over your chest.
3.Spine inert:
- Your spine can be kept in a neutral position by maintaining a straight neck and lower back.
4.Start the Protest:
- Inhale deeply and clench your stomach.
- Start the exercise by raising your torso, and keep going until your body forms a straight line.
5.Total Expansion
- Raise your torso till it is either parallel to your legs or slightly above them.
- Avoid putting too much strain on your back.
6.Controlled Dropout:
- Exhale, then slowly raise your body back to the starting position.
7.Once more:
- As your strength improves, increase the amount of repetitions to fifteen in three sets.
Variations for Beginners:
Partial Range of Motion:
- Perform back extensions with a smaller range of motion until you build enough strength for a full extension.
Bodyweight Only:
- Start without any additional resistance, focusing on perfecting your form before adding weights.
Assisted Back Extensions:
- Have a training partner assist you by holding your legs, making the movement more manageable for beginners.
Reverse Hyperextension:
- Lie facedown on a raised surface, such as a bench, and lift your legs instead of your upper body.
As you wrap up week 5 of your beginner back exercises, celebrate the progress you've made! Consistency is key, and by now, you've built a foundation for a stronger, more resilient back. The variety of exercises introduced has not only targeted different muscle groups but also enhanced your overall posture. Remember to listen to your body, allowing for proper rest and recovery. Moving forward, consider gradually intensifying your routine and exploring new challenges. The journey to a healthier back is ongoing, so stay committed, stay mindful, and revel in the positive changes you're nurturing each week.
Post a Comment
0Comments